Is it a skirt/top? Is it a dress? No! It’s Super Versatile

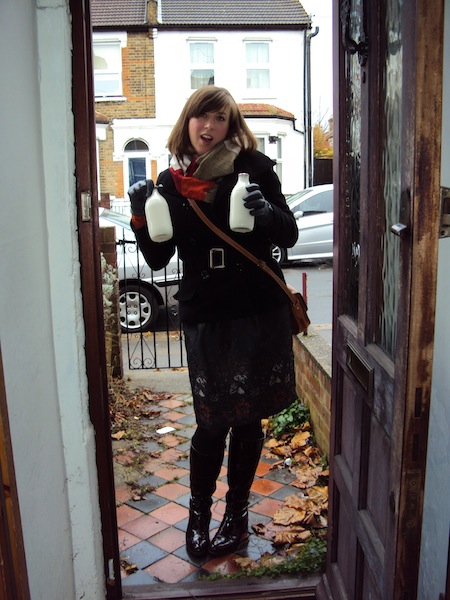
I was hoping to have finished Vogue 1247 by now. I am in the home stretch, but stretch is the optimal word. Last minute impatience had me rushing to finish the sleeve cuffs and hem, this has led to some wonky and ripply edges. I’m taking a break to return when Little Miss Impatient is asleep (er, that’s my brain, not an actual child or anything…).

In the mean-time, I’ve been dreaming of the next items in my wardrobe challenge. Which is probably part of the problem described above, so I know I shouldn’t, but, well, I can’t help it…

From somewhere I seem to have become obsessed with tops and skirts masquerading as dresses. I first became aware of this phenomenon from vintage patterns, where things I would call a two-piece seem to be called a dress.

Picture sources @ Melanie on Pinterest

(And, conversely, according to Claire Shaeffer, Chanel would oft-times sew a shell top to a skirt in order to make the skirt hang better. This wasn’t meant to be seen as a dress, so seemingly was still called a skirt. Who knew you could play so fast and loose with the terminology?)

Then there came the much-made peplum combo from Burda Aug 2012.

Source: burdastyle.com via Melanie on Pinterest

You would think this is dress. Fooled again! It’s a skirt/top. I wanted to make that skirt/top so badly. I think it was about that time that a small neuron stuck up its dendrite and suggested ever so quietly that, even better, if I made two, I could mix and match them, the skirt from one with the top from the other. Might I still do that? Well, maybe… there’s a piece of black hound’s tooth that’s got peplum written all over it. But the turqoise linen is getting made up into a two piece peplum. right. now.

So to meet the requirements of the challenge without looking like a great big peplum weirdo, my plan is to take one of the other fabrics and make both a skirt, which can also be matched with the peplum, and a second top of a different design. That way all four items will co-ordinate with each other, but I still get to indulge in the skirt/top masquerade gimmick, and I’ll have two different looks. I know!

However, (and it’s always more complicated when my brain gets involved), back to the actual Burda pattern, I decided, after reading Fehr Trade‘s review, that I would want to swap the bodice for something else. Various plans ensued: redraft the supplied bodice by manipulating the waist dart into a princess seam; use the top half of the wiggle-dress from Gertie’s Book for Better Sewing; oh, wait, what’s that weird non-pattern at the start of Pattern Magic 2?

Pattern Magic: 'Basic Lesson'

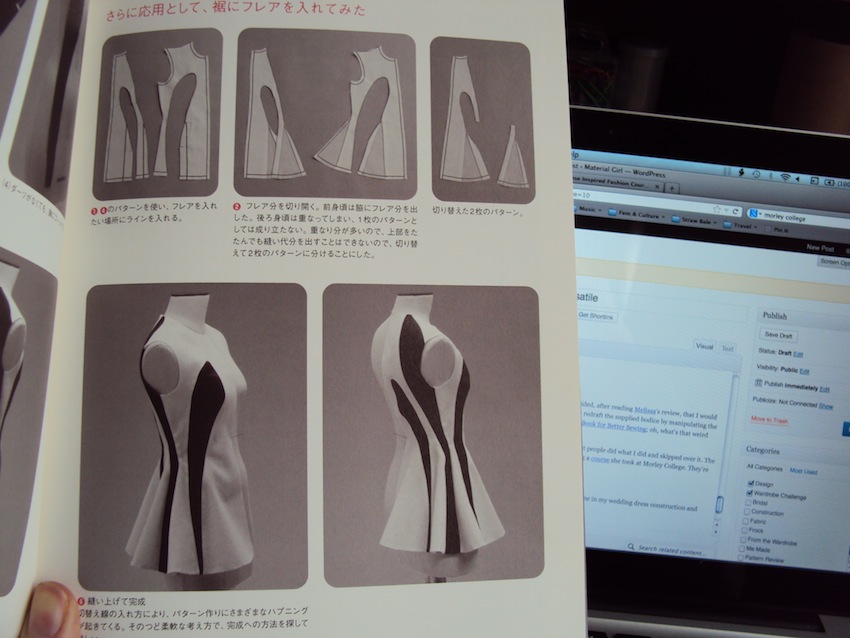
Pattern Magic: ‘Basic Lesson’

So, without further ado here are my initial designs for the turquoise linen/silk blend and African wax fabrics.

Mix and match

Mix and match

I’ve tried to find an on-line example of someone making this, but it seems that most people did what I did initially and skipped over it. The only reference I can find to making this top is in a post, again by Fehr Trade, describing a course she took at Morley College. They’re doing another one this year, look.

So you’ll just have to look at my grainy photo and the shaping lines in my design illustration, until I show my pattern.

This also ticks off one of my challenge aims: using some instructions from the Pattern Magic books.

I’m getting excited about sewing my peplum a year after the trend hit, although, there are some who are, apparently, ‘over’ it already! I don’t care!

Advertisement

From the Wardrobe: Decanter Fine Wine Encounter

I’m going to delve back into previous makes and blog them for posterity! First up, a Burda Magazine dress I made for our annual jaunt to the Decanter Fine Wine Encounter, where I encountered a LOT of wine.

Pattern: Dress 111, September 2009 edition of Burda Magazine.

Made/occasion: Made in Oct/Nov 2012 for special occasion (see above)

Alterations/Fitting: No design alterations apart from fully lining the dress. Fitted well, apart from at hips. Decreased hips by inch or two (this is a normal adjustment for me as my hips are narrower than the pattern models used).

Fabric: Not sure of the fiber content. Structure is taffetta like. Main colour is black with small woven grey diamonds at intervals, and there is a woven boarder of antique gold, copper and pewter flowers. My biggest mistake was pre-washing this fabric. The fabric didn’t shrink, but there are now distortions in the weave which show up as grey crease marks. No amount of pressing gets rid of these babies (but I might try sending it for dry cleaning to see what happens).

Pattern instructions: They were typically minimally Burda-y. I.e. you could follow them, but they’re not giving you any extra. HOWEVER, there is a mysterious ‘lining’ piece that I didn’t figure out until half way through the muslin stage. Why, oh why, I thought, is there only one lining piece? Well, it isn’t a lining piece, that’s why. This dress is unlined as drafted in the magazine. No! The ‘lining’ piece is actually an internal structure keeping the two princess side pieces where they’re supposed to be. Absence of this piece means the front and back pleats are free to pull open. As I wasn’t lining my muslin I omitted this piece at the fitting stage only to hastily stitch it in as my pleats went flapping around all over the place. In the finished piece I used silk organza for the, ahem, structural lining.

The mysterious 'lining'

The mysterious ‘lining’

My construction notes/ thoughts: I picked this dress because I really wanted to showcase the border weave on this fabric. Most of the fabric is boring black and I didn’t want to just have the border around the skirt hem. Therefore I pieced the dress using the border in the central front and back pieces (upside down), and in the cap sleeves as well as round the skirt. I deliberately pieced the cap sleeves differently so that I didn’t have two bold flowers staring at you from my shoulders. I like the way the fabric placing highlights the face and decolletage.

I lined the dress by using the drafted pattern pieces, but cutting and sewing the bodice pieces at the pleat overlap lines, so the lining is smooth (this will make sense if you look at the pattern pieces). Instead of constructing the cap sleeves as full circles, folded in half and basted before setting in, as drafted, I cut a half circle from the shell fabric and one from the lining, hemming them at the long straight edge before setting them in as per the instructions. I hand-picked the lining at the neck and round the armholes.

Recommend/make again?: This is quite an elegant dress. It is also unusual with the front and back pleating, and I like the way the pleat matches up with the skirt pleats to look like a continuous fold when wearing a belt (when not, you can see the waist seam). This is quite a sophisticated design element for Burda, I think. I’ll leave you to decide if you can cope with the extra fabric over the boob area. I was concerned before-hand, but decided it’s not too much for me.

I would make this again. I like the style, but the fabric means I won’t be wearing this unless for best. A nice, red, woolen version would be smart for work, I think.

Look what I found...

My first Encounter of the day

WordPress likes to offer me related content when writing posts. Here’s one to help you matching those lovely pleats on the front of the Burda dress. Making sure they line up means you can take advantage of this sophisticated style element